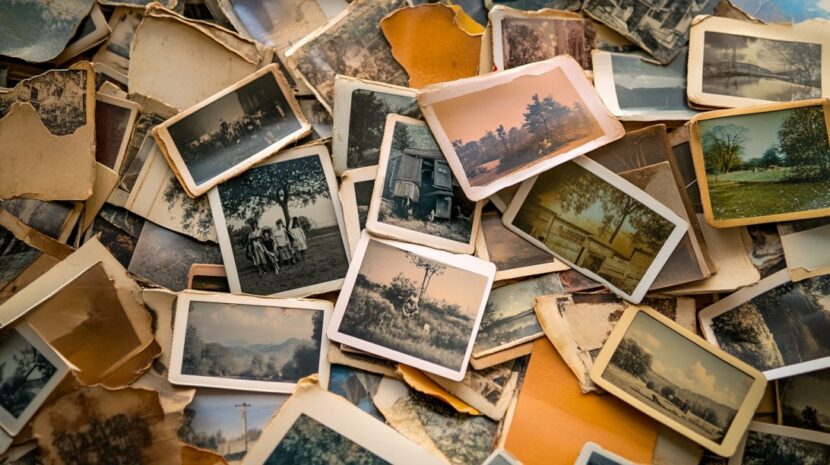
Digital photo libraries often spiral out of control, turning cherished memories into overwhelming clutter. The goal is simple: build a sustainable photo management system that offers peace of mind and makes finding photos effortless.
Benefits include mental clarity, easier sharing, and long-term preservation of what truly matters.
Let us talk about it in greater detail.
Step Zero: Set Your Goals and Mindset

Photo organization doesn’t start with folders or software, it starts with intention. Before opening any file manager, take a moment to define what success means for your personal photo library. Different people have different needs. Some want a clean archive with only the best shots.
Others aim to create albums, scrapbooks, or family histories. Without a clear goal, the process quickly becomes overwhelming and directionless.
Ask yourself: Why am I organizing these photos in the first place? Maybe you’re tired of endless scrolling, or maybe you’re looking to make meaningful use of years of forgotten digital clutter. Either way, you’ll need a clear vision to guide the process.
- Quick access to favorite memories
- Better ability to share albums with friends or family
- Reduced digital clutter for a calmer experience
- Preparation for printing or creating photo books
- Easier backup and long-term storage solutions
Once your goal is in place, decide how ruthless you’re willing to be when it comes to deletion. Some people cling to every blurry photo or food pic, while others are happy to wipe away entire folders. Find your comfort zone before moving forward.
Keeping everything leads to a bloated mess. Deleting too much, too fast, can lead to regret. Strike the balance that feels right.
It’s important to set realistic expectations. Organizing over 10,000 photos will not be a one-day task. It’s going to take effort, and yes, some tedium. But every hour spent now saves time, stress, and frustration later. A clean library is easier to navigate, faster to search, and more satisfying to use.
Step One: Centralize All Your Photos
Before any sorting or deleting can begin, start by collecting every photo into one central location. Scattered images across multiple devices and accounts make it nearly impossible to know what you have or where to find it. Consolidation lays the foundation for all organization efforts that follow.
Pull files together methodically. Check each of your devices and services, not just the obvious ones.
Go through smartphones, tablets, laptops, old desktops, memory cards, USB sticks, external hard drives, cloud platforms like iCloud, Google Photos, Dropbox, and even old emails or messaging apps where photos might have been shared or stored.
Once all sources are identified, gather every file into a single folder on your computer. Name it something obvious and all-encompassing, such as PHOTO DUMP or ALL PHOTOS RAW. Don’t worry about organization, duplicates, or blurry shots at this stage. Right now, the only goal is consolidation.
- Make a checklist of all sources: Phones, cloud accounts, external drives, computers, old CDs/DVDs, etc.
- Use syncing apps when available: Services like iCloud or Google Drive often allow batch downloads.
- Transfer files in batches: Avoid moving everything all at once—do it in manageable chunks.
- Place everything into your master folder without renaming or sorting.

Before doing anything else, secure a backup. Reorganizing thousands of files always carries some risk, and a single accidental click can delete memories that are impossible to recreate. Save the full PHOTO DUMP folder to an external hard drive or a secure cloud platform.
For extra safety, keep one local backup and one in the cloud.
Step Two: Eliminate Duplicates
Nothing derails a photo organization effort faster than drowning in duplicates. Hundreds of nearly identical photos taken in burst mode, accidental downloads of the same cloud album, or syncing across devices can result in massive redundancy.
Start by choosing a reliable tool to automate the first sweep. Manual deletion is inefficient for libraries exceeding 10,000 photos. Several applications offer dependable detection algorithms to help:
- Gemini Photos (iOS/macOS): Smart detection with visual similarity scanning.
- ACDSee Photo Studio (Windows): Advanced search and comparison tools, ideal for large libraries.
- Adobe Lightroom: Perfect if already using it for editing; has built-in tools for spotting duplicates.
Once a tool is selected, run a scan of your centralized “PHOTO DUMP” folder. Before deleting anything, check the settings to ensure it preserves key metadata such as file creation dates, resolution, and original device information. Mistakes here can ripple across your entire photo timeline.
Avoid relying purely on image previews or thumbnails. Two photos might look identical at a glance but contain critical differences—one may be edited, while another might be the original file. Metadata should drive your decision-making.
Step Three: Create a Logical Folder Structure

With duplicates eliminated, the next move is to build a folder structure that reflects how your brain categorizes memories.
A pile of clean images still means chaos unless there’s order behind it. Folders act as the framework, and structure prevents backsliding into digital mess.
Start by thinking about how you search for photos. Is it by date? By event? By type of content? Answering that helps define the folder system that will work best.
- Date-Based Structure: Example: 2023 > 08_August > Italy_Vacation
- Works best for those who remember events by year and month.
- Category-Based Structure: Example: Family > 2022 > Grandma_90th_Birthday
- Ideal for people who group images by themes like events, people, or places.
Use underscores or dashes instead of spaces in folder names for better compatibility with backup tools and search engines. Always include a year or a month tag, especially for event-based sorting. Consistency is essential. Choose a system and don’t deviate.
Step Four: Cull Ruthlessly
Now that everything is neatly placed, it’s time to wield the delete key with confidence. Clutter isn’t just messy—it devalues memories by crowding them with irrelevant filler. Aim to create a gallery, not a garbage bin.
Good culling is about asking hard questions and trusting your instincts. Sentimentality often gets in the way, but too much of anything dilutes the emotional impact.
Quality beats quantity every time.
- “Would I print this or post it online?”
- “Does this capture a moment I genuinely care about?”
- “Do I have a better version of this same moment?”
Don’t keep six angles of the same lunch. Don’t store blurry fireworks. Let go of screenshots you forgot about. If a photo doesn’t move you, it’s not worth keeping.

- Start with obvious trash: screenshots, photos of receipts, duplicates you missed.
- Move on to low-quality images: blurry, dark, off-center.
- Finish with near-duplicates: keep the best, ditch the rest.
Create a temporary “Review Later” folder if emotional attachment makes decisions hard. Revisit it in a few weeks with a fresher perspective. Most of the time, you won’t even remember what’s in it—and that tells you everything.
Step Five: Tag and Keyword Strategically
Folders give you structure. Keywords give you power. Once photos are sorted and trimmed, tagging becomes the search engine of your collection. Finding photos by typing a single word is a luxury that starts here.
Manual tagging sounds painful, but smart software makes it manageable. Many programs let you tag batches of photos at once, and some even apply smart recognition to speed up the process.
- People (e.g., “Mom,” “Kids,” “Jake”)
- Events (e.g., “Wedding,” “Graduation,” “Birthday”)
- Places (e.g., “Paris,” “Beach,” “Grand Canyon”)
- Themes (e.g., “Pets,” “Food,” “Sports”)
Mac users can take advantage of Smart Albums and tag-based filters using the built-in Photos app. PC users will benefit from ACDSee or Adobe Bridge, which embed metadata directly into image files for long-term accessibility.
Step Six: Regular Monthly Maintenance

Success isn’t about one-time effort—it’s about keeping the system alive. Maintenance prevents the mess from creeping back in. Monthly attention keeps your collection lean and fresh, avoiding future overwhelm.
Set a recurring reminder to review and organize new photos at the beginning of each month. Handle the latest batch while the memories are still fresh and details are easy to remember.
- Process photos taken in the current month.
- Choose one previous month or folder from the past and bring it up to standard.
- Apply the same folder, naming, culling, and tagging principles.
- Back up your updated library after each session.
Even 30 minutes a month can keep your library polished. Letting things slide only leads to another digital disaster. Momentum matters. Make maintenance a ritual—grab a coffee, put on music, and enjoy reviewing recent memories.
Summary
Photo organization isn’t just about files, it’s about clarity, ease, and celebrating what matters. Focus on consistency, not perfection.
Keep refining, take breaks when needed, and recognize progress as success. Every step forward is a win.